Table of Contents
Table of Contents
If you’ve ever wondered how your website or your clients’ sites are performing on Google, a Google rank tracker tool is exactly what you need. Simply put, it’s a tool that monitors where your website ranks for specific keywords on Google search results over time. Think of it as a way to track your SEO performance without having to search for every keyword, every day, manually.
Now, here’s the kicker: you don’t need to rely on expensive third-party software to do this. With a bit of know-how, you can build a Google Rank Tracker tool using n8n, automating the whole process so that rankings, updates, and alerts happen on their own. This not only saves time but also gives you real-time insights into your SEO efforts, helping you spot trends, track competitors, and make smarter decisions about your content strategy.
Throughout this guide, we’ll break down every step, explain how the workflow works, and show you exactly how to set up a reliable system that keeps you on top of your Google rankings. No fluff, no complicated jargon, just practical, hands-on instructions that anyone with basic technical knowledge can follow.
Google Rank Tracker Tool Using n8n Tutorial
Prerequisites and Setup
Before we start building, let’s get the basics in place. I’ve learned the hard way that skipping setup steps usually means wasting double the time later. So, think of this as packing your bag before a trip, you want to make sure you’ve got the essentials.
Required Accounts and Tools
Here’s what you’ll need on hand to build a Google Rank Tracker tool using n8n:
- n8n account or installation – You can either sign up for n8n Cloud (super quick, no installation) or run it yourself on a server or even locally.
- SERPHouse API Key – Since Google doesn’t just hand you ranking data, you’ll need an API service like SERPHouse. These will give you clean JSON responses for your keywords.
- Somewhere to store the results – If you just want to test things, Google Sheets is fine. For something long-term, Postgres or Airtable works better.
That’s it, nothing fancy, just the core tools that keep everything running smoothly.
Installing and Accessing n8n
You’ve got a few ways to get n8n up and running:
- n8n Cloud – Easiest option. Sign up, log in, and you’re already inside the workflow editor. No installs, no updates, no headaches.
- Local install – If you’re just testing, you can run it on your laptop with npm or Docker. Great for experimenting before you commit.
- Self-hosted – For something serious (like a rank tracker you’ll run daily), putting it on a VPS like DigitalOcean or AWS is the smarter move. That way, it runs 24/7 without depending on your personal machine.
Once it’s installed, just open your browser and head to your n8n instance. The editor is all drag-and-drop, so you’ll be able to visually connect the workflow we’re about to build.
Project Overview: What the Automation Will Achieve
So, what exactly are we building here? At its core, this project is about taking a task that’s boring and repetitive, checking Google rankings for keywords and turning it into something that just runs on its own. Instead of opening up Google every day, typing in each keyword, and scrolling through results, n8n will handle all of that for us in the background.
Here’s what the automation will actually do step by step:
- Kick off automatically on a schedule you define (daily, weekly, etc.).
- Grab your list of keywords from a sheet or database.

- Call an API for each keyword to fetch the latest Google results.
- Extract the ranking position of your site from those results.
- Save the data into a database or sheet so you can track changes over time.
In the end, you’ll have your own personal Google rank tracker customized to your workflow, not locked into someone else’s tool. The best part? Once it’s set up, you don’t really have to touch it again. The workflow runs in the background, gathers rankings, and keeps your SEO tracking neat and organized.
Creating a New Workflow in n8n
Alright, let’s get started with building your Google Rank Tracker Tool using n8n.
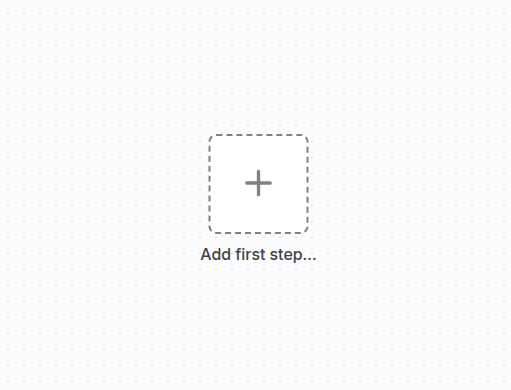
First off, when you open n8n, you’ll see a clean dashboard. It might look a bit empty if you’re new, but don’t worry, that’s where the magic begins.
To get started, simply click the Create button. This opens a brand-new blank canvas where you’ll build your automation step by step.
Think of this canvas like your workspace. Each action you want your tool to do will live here.
You’ll use something called nodes. Each node represents a task, like grabbing data or sending information somewhere.
Right in the middle, you’ll spot a big button that says Add first step… Click on it, and you get to pick what your workflow should start with.
Early on, you’ll mostly choose a trigger node. This tells your workflow when to start running.
The canvas lets you drag and drop these nodes, hook them up in order, and see exactly how your data flows. It’s like building a flowchart, but way cooler.
Don’t worry if it feels new at first. You can always move things around and fix mistakes easily.
Adding the Webhook Trigger and Setting Up the Webhook Node
Now that you have your workflow canvas ready, it’s time to add the all-important trigger to the Webhook node.
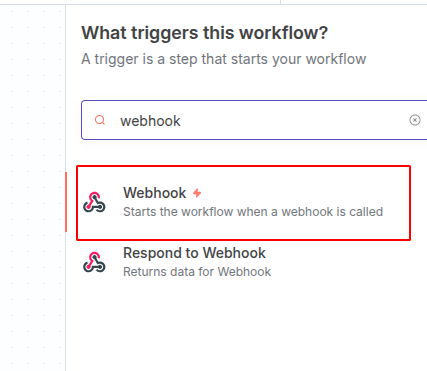
The Webhook trigger is what wakes your workflow up whenever it receives data from outside, think of it as your front doorbell.
Here’s how to set it up:
- Click Add first step on the canvas and search for Webhook. Select it.
- Set the HTTP Method to POST. (Or pick any method you need, like GET, PUT, just choose whatever fits your use case.) This means your webhook expects data to be sent over, like keywords or commands.
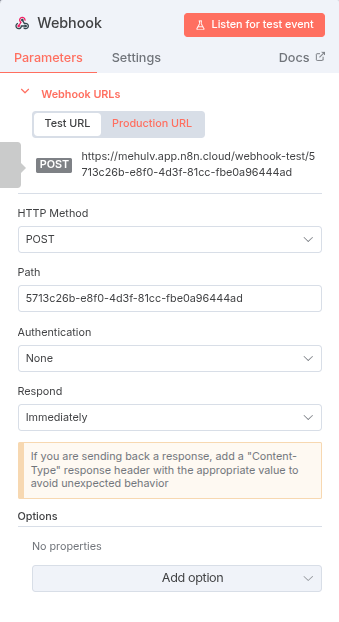
- For now, leave Authentication off. You don’t need extra security during testing. You can lock this down later if you want.
- Set the webhook to Respond Immediately. This ensures any tool hitting your webhook, like Postman, gets a quick “Got it!” reply without waiting.
Once you save these settings, n8n will give you two URLs: a Test URL and a Production URL.
The Test URL is perfect for development. You can copy it and paste it into Postman or any HTTP client to send test requests and see your workflow come alive in real time.
Connecting Google Sheets in n8n
Let’s bring your Google Sheets data into the workflow. This is where you grab your list of keywords or any other info you want to process.
Accessing Google Sheets Actions
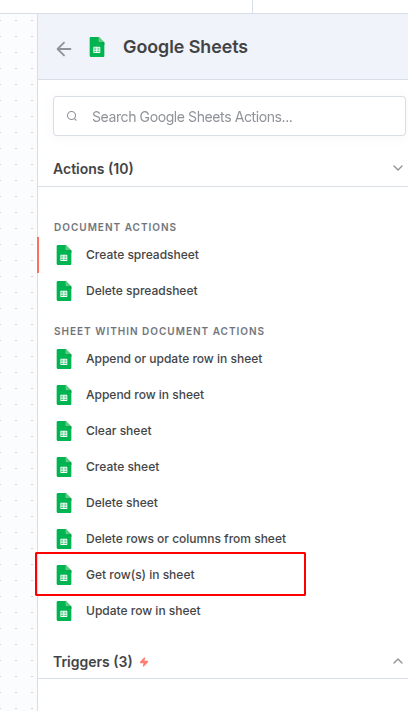
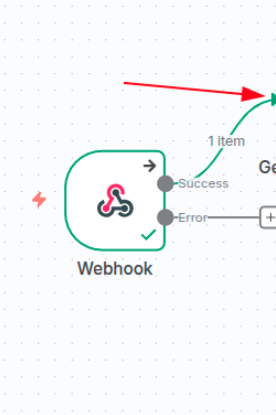
Start by clicking the small “+” button after a successful trigger step. This opens the node menu.
Search for Google Sheets in the search box. When you spot it, select the Get row(s) in sheet action. This node lets you pull data from a specific sheet in your Google Sheets document.
Configuring the “Get row(s) in sheet” Node
Now it’s time to set the details:
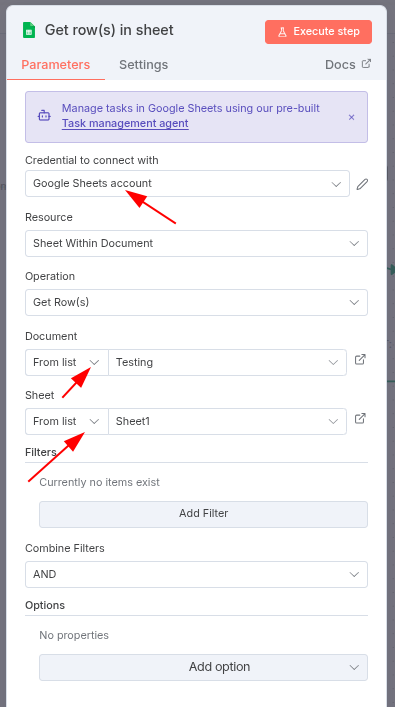
- Credential to connect with: Choose your Google Sheets account. Make sure you’ve already linked your credentials in n8n.
- Resource: Select Sheet Within Document, since you want to access a sheet inside your Google Sheets file.
- Operation: Choose Get Row(s) to pull data.
- Document: Use the From list dropdown to find and select the Google Sheets document you want to work with.
- Sheet: Pick the specific sheet inside that document, like “Sheet1” or “Sheet2.”
- Combine Filters: Set this to AND by default, which helps if you want to add multiple filtering conditions later.
Once you’ve set this up, your workflow can pull rows of data from that Google Sheet. This makes it easy to loop over rows of keywords or any other content you want to track.
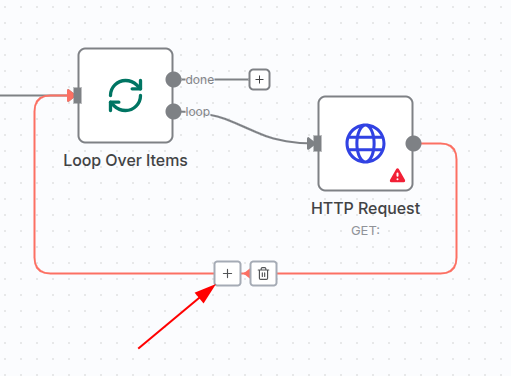
Looping Through Keywords with the “Loop Over Items” Node
After pulling rows from your Google Sheet, you need to handle each keyword one by one.
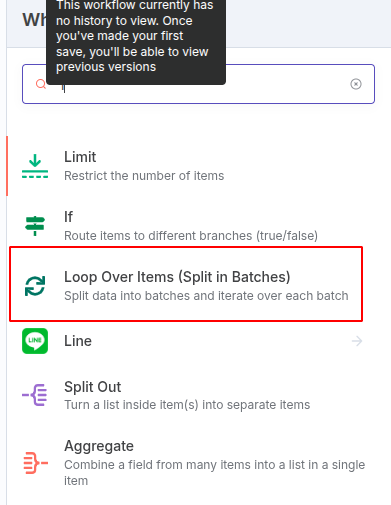
Add the Loop Over Items node next in your workflow.
This node splits the list of keywords into smaller groups and processes each keyword separately.
Connect the output of the loop to the next node, like an HTTP Request node that sends each keyword to the SERP API.
This keeps your workflow neat and ensures each keyword gets processed without overload.
Preparing HTTP Requests for the SERP API
Next, add the HTTP Request node to send your keywords to the SERP API.

- Method: Set this to POST.
- URL: Paste in the SERPHouse API endpoint from their documentation.
- Authentication: Choose Generic Credential Type.
- Generic Auth Type: Use Bearer Auth (that’s what SERPHouse requires, but always check your API’s requirements).
- Bearer Auth: Select the credential with your SERPHouse API key. Add “Bearer” before your API key—this is required for SERPHouse authorization.
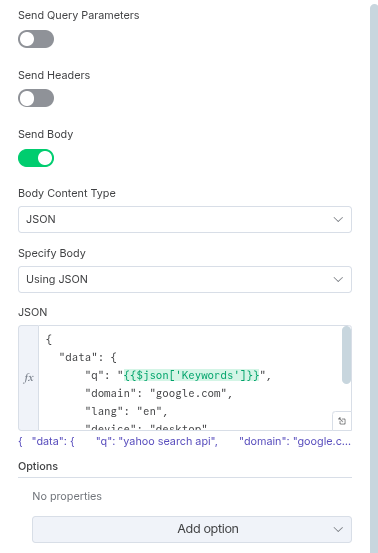
- Send Body Parameters: Turn this ON.
- Body Content Type: Choose JSON.
- Specify Body: Use JSON and paste in your JSON data template.
Before saving, double-check that your JSON data uses the variable from the loop (like {{$json[“Keywords”]}}). This ensures each API call is fresh and accurate.
And that’s it. With this setup, n8n will talk directly to the SERPHouse API for each keyword: sending data, getting SERP results, and helping you stay on top of your rankings-all for free (at least up to 400 credits). It’s everything a smart, cost-effective SEO needs.
Running JavaScript for SERP Data Extraction
Once your HTTP Request node is set up, you need a way to extract the important info, like URLs and keyword position,s from the API response.
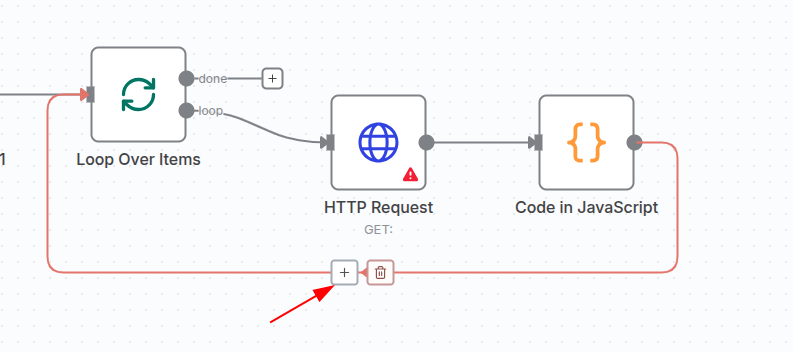
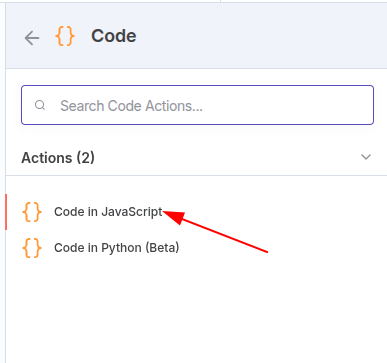
- Add a Code node next in your workflow. Just click the plus button and search “code”.
- Choose Code in JavaScript.
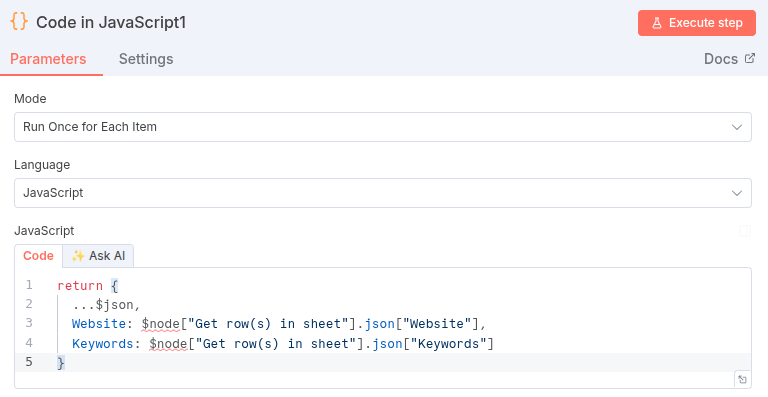
- For Mode, select Run Once for Each Item. This means your JavaScript will process each keyword’s API response individually.
- Keep the language set to JavaScript.
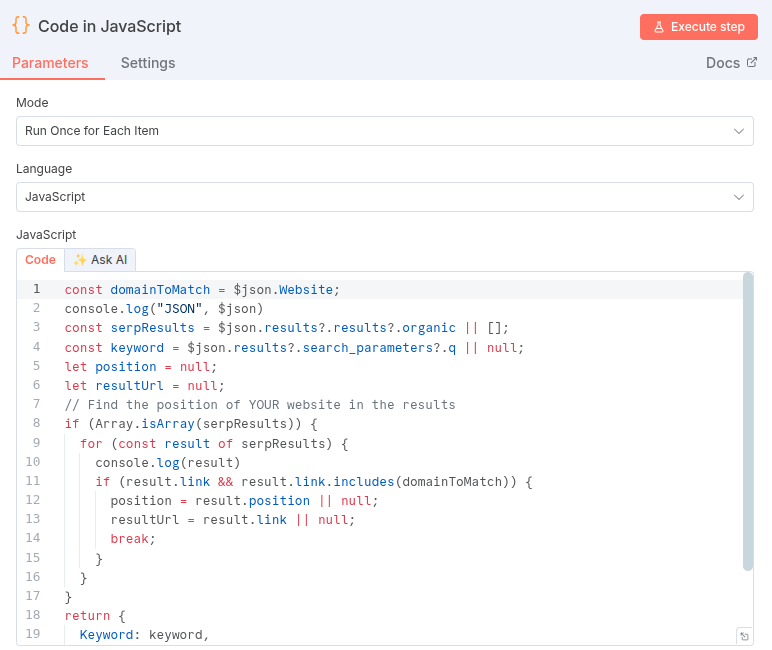
- Paste your JavaScript code into the editor. This code should parse the API response, find your target URL, and extract its position in the rankings.
Here’s the full working code
This step turns raw data into neat, actionable info your Google Rank Tracker can use. It’s the magic behind understanding where your website sits in the search results.
Once configured, this node feeds clean data forward to save or analyze later.
Writing Results Back to Google Sheets
Now that you’ve got your rank data, let’s send those results back to your Google Sheet so you can see everything in one place.
Append/Update Row Node Setup
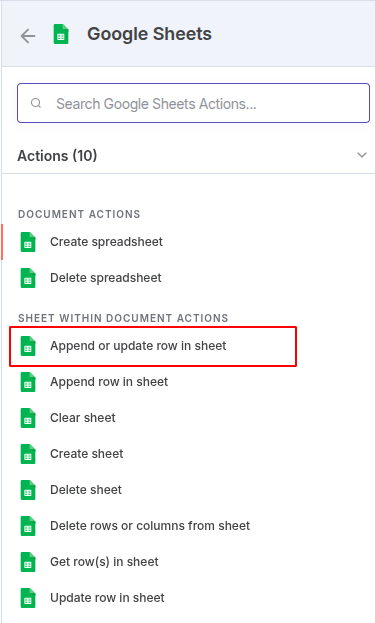

- Credential to connect with: Pick your Google Sheets account again. This keeps everything secure and connected.
- Resource: Use Sheet Within Document.
- Operation: Choose Append or Update Row. This lets n8n add new results or update existing ones for each keyword.
- Document & Sheet: Select the same Google Sheet and sheet name (like “Sheet1”) you used when fetching the rows earlier. Double-check that both this node and your “Get rows” node point to the same doc and tab.
- Mapping Column Mode: Set this to Map Each Column Manually. This gives you full control over which data goes where.
- Column to match on: Use Keywords as your unique identifier. n8n will look for this column to know what to update or append.
With this setup, every keyword result lands exactly where it should. Your Google Sheet updates itself, no copy-paste, making your tracker automated and always current.
Review and Output
Here’s the fun part seeing everything work in practice!
Once your automation has run, you’ll see the results show up in two places:
n8n Output Table:
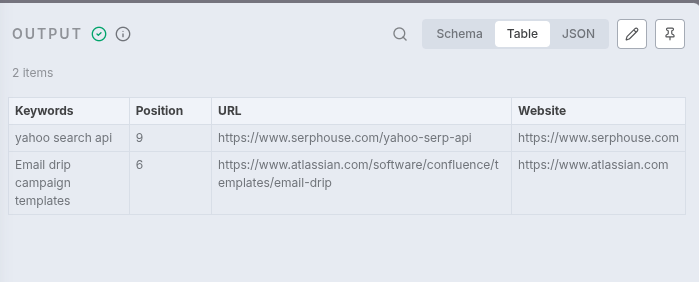
In n8n, click on the last node (like “Append or update row in sheet”) after your workflow runs. You’ll spot a green checkmark and a neat table view. The table lists each keyword, its rank, and the URL found, making it easy to scan for issues or double-check results.
Google Sheet Updates:
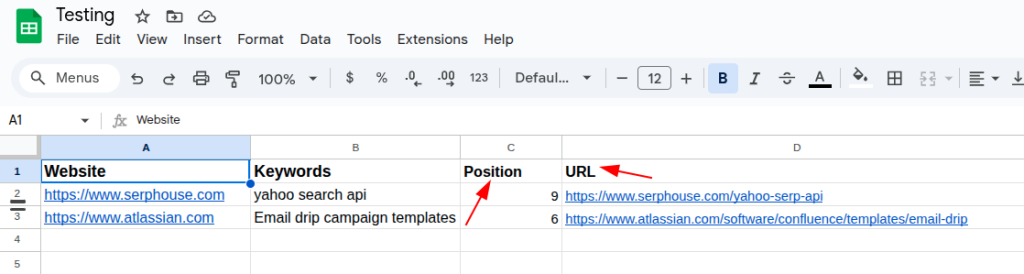
Open your Google Sheet and find the same tab you used in the workflow. You’ll see new rows or updates to keywords matched, ranking positions, and URLs all written back exactly where you wanted. It’s instant, hands-free tracking.
No more juggling CSVs or copying data from tools. Just run your workflow, and your sheet stays up-to-date. Seeing that data fill in by itself? It’s such a win for any busy SEO. After your workflow runs, it’s time to celebrate seeing real results!
First, check your n8n node’s Output Table. You’ll see a live preview of every keyword processed, complete with ranking positions and URLs. It feels great to watch each record handed off perfectly.
Then, pop open your Google Sheet. Your results appear automatically with new rows for fresh keywords and updated ranks for the old ones. Everything lands in the right place; no manual copy-pasting needed.
Complete Workflow Overview
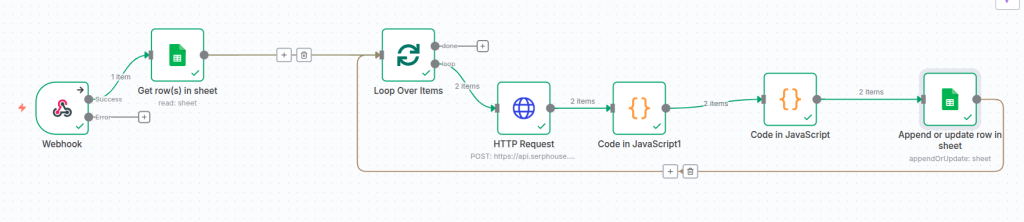
Let’s take a step back and look at how your entire Google Rank Tracker workflow in n8n comes together.
At the very start, you have the Webhook Trigger, which is your automation’s front door. Anytime you send data to this webhook, the workflow springs into action.
Next is the Google Sheets node that fetches your list of keywords. This is where your tracker gets the questions it needs to answer.
The keywords then flow into the Loop Over Items node. This clever step takes your list and handles each keyword one at a time, making sure nothing gets lost or rushed.
For each keyword, the HTTP Request node talks to the SERPHouse API. Remember, this is where those 400 free credits come in handy to get real, fresh ranking data.
After the API sends back its response, the Code node steps in. It extracts just the important info like your website’s position and URL on Google—from all that data.
Finally, the Append or Update Row in Google Sheets node adds or refreshes this info back into your sheet. Your list stays updated without you lifting a finger.
Visually, your workflow looks like a smart, well-oiled assembly line. Each node plays its part perfectly, passing data smoothly to the next. This clear map of actions not only makes your tracker reliable it also makes your work easier to manage and improve over time.